QUESTION How to add turn signals to the car?
- Thread starter Swift_R16
- Start date
fughettaboutit
aka leBluem
Cars – Emissive objects
Configuration files for Assetto Corsa Custom Shaders Patch - ac-custom-shaders-patch/acc-extension-config
 github.com
for extension\ext_config.ini
[EMISSIVE_TURNSIGNAL_LEFT_...]
NAME=blinkerL
COLOR=255, 120, 0
LAG=0.8
SIMULATE_HEATING=0.0
LOCATION=NONE
AFFECTS_TRACK=1
[EMISSIVE_TURNSIGNAL_RIGHT_...]
NAME=blinkerR
COLOR=255, 120, 0,100
LAG=0.8
SIMULATE_HEATING=0.0
LOCATION=NONE
AFFECTS_TRACK=1
Rob Pawn
Active Member
Cars – Meshes splitting
Configuration files for Assetto Corsa Custom Shaders Patch - ac-custom-shaders-patch/acc-extension-config
github.com
or simply use something like this: (its actually the Dashboard)
[CustomEmissiveMulti]
Meshes = Plane.048
UseEmissive0AsFallback = 1
Resolution = 2048, 2048
@ = CustomEmissive_UseDiffuseLuminocity, From = "0.40, 0.2", To = "0.1, 0.3", SkipDiffuseMap = 0
@ = DashHighlight
@ = MultiItem, Role = TURNSIGNAL_RIGHT, Channel = 3, Start = "506, 1034", Size = "67, 34", CornerRadius = "0.25, 0.25"
@ = MultiItem, Role = TURNSIGNAL_LEFT, Channel = 3, Start = "506, 1034", Size = "67, 34", CornerRadius = "0.25, 0.25"
@ = MultiItem, Role = HANDBRAKE, Start = "1029, 979", Size = "67,34", CornerRadius = "0.25, 0.25"
@ = MultiItem, Role = EXTRA_A, Color = "15,0,0,2.2", Start = "1029, 1090", Size = "67,34", CornerRadius = "0.25, 0.25"
@ = MultiItem, Role = EXTRA_B, Color = "0,10,0,2.2", Start = "1029, 1090", Size = "67,34", CornerRadius = "0.25, 0.25"
@ = MultiItem, Role = EXTRA_C, Color = "0,0,20,2.2", Start = "1029, 1090", Size = "67,34", CornerRadius = "0.25, 0.25"
@ = MultiItem, Role = OIL_PRESSURE, InputThreshold = 1.2, InputInverse = 1, Start = "506, 1090", Size = "67,34", CornerRadius = "0.25, 0.25"
@ = MultiItem, Role = HAZARD, Color = "15,0,0", Start = "506, 978", Size = "67,34", CornerRadius = "0.25, 0.25"
@ = MultiItem, Role = Headlights, Color = "0.2,1,15,2", Start = "1761, 1762", Size = "59, 42", CornerRadius = "0.25, 0.25"
@ = MultiItem, Role = EXTRA_D, Color = "0.2,1,15,2", Start = "1760, 1804", Size = "59, 37", CornerRadius = "0.25, 0.25"
Last edited:
Swift_R16
New Member
I tried that syntax you had listed and it didn't work, then I tried the one in the link and still no luck.
This is what I have, not sure what I'm doing wrong.
This is what I have, not sure what I'm doing wrong.
Code:
[MESH_SPLIT_...]
ACTIVE = 1             ; Quickly enable or disable section
MESHES = taillight_2, setas_dianteira                 ; List of meshes to cut
SPLIT_NAME = turn_signals         ; Specify exact mesh name of new split mesh
SPLIT_POSTFIX =            ; Postfix for the new split mesh, not used if name is set explicitly
SPLIT_MATERIAL = amberlight         ; Specify exact material name of new split mesh
SPLIT_MATERIAL_POSTFIX =     ; Postfix for the material for the new split mesh, not used if name is set explicitly
INSERT_TO = node         ; Specify new parent for new mesh
INSERT_IN_FRONT = 0
MODE = PLANE                ; Available options:
                ; PLANE = Split along a plane based on the SPLIT_AXIS
                ; LOOK_AT = Split mesh triangles facing given direction
                ; COPY_FLIPPED = Take mesh, duplicate, then invert direction. Useful to to fix missing interior windows

; if MODE = LOOK_AT
LOOK_AT = 0, 0, 0         ; Cut mesh triangles facing this point relative to the parent of the mesh
LOOK_AT_THRESHOLD = 0         ; Specify how precisely the faces must be facing the above point to be selected. 0 for all.

; if MODE = PLANE
SPLIT_AXIS = 0, 1, 0           ; axis to cut mesh by (cut will be perpendicular to it, where X is lateral, Y is Longitudinal, Z is vertical
SPLIT_THRESHOLD = 0.0          ; offset for cut along the line, in meters

MODEL_SPACE = 0         ; Convert the co-ordinates to use the car root node instead of mesh parent node
Attachments
-
 234.4 KB Views: 43
 -
 469.9 KB Views: 49
Rob Pawn
Active Member
iam not sure how much understanding you have and how deep you are in this thematic...
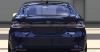
mesh split: on mesh "taillight_2" i guess its only the rear indicators like to see in 2nd picture? nothing else?
i suggest start with one mesh so get rid of the "setas_dianteira".
And then maybe experiment a bit / try and error...
did you put something like this in your config, as well:
[EMISSIVE_TURNSIGNAL_LEFT_1]
NAME = turn_signals
COLOR = 30, 20, 0, 3
LAG = 0
REPEAT_FREQENCY_HZ = 2.9
REPEAT_FREQENCY_HAZARDS_HZ = 2.9
LOCATION = FRONT
SIMULATE_HEATING = 0
for the "syntax":
just copy paste will not work, of course.
did you set up picture size and location coordinates?
only thing here, i think, you wouldn't get the bounce back thing on the surrounding surfaces...
remote diagnostics on this theme is rough.
so maybe easiest and fastest way for you would be splitting the mesh manually in 3D software.
Last edited:
